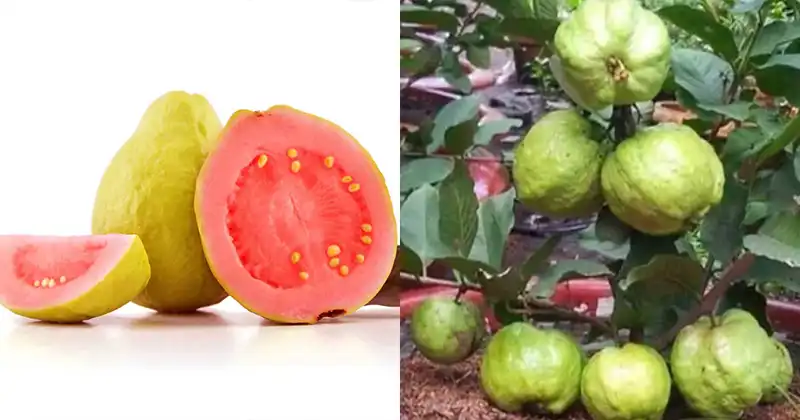
Growing Guava at home in pots: The secret to a plentiful harvest
Guava (Psidium guajava) is a tropical delight that brings an explosion of sweet, aromatic flavor to the palate. While typically found in tropical and subtropical regions, guava can be successfully grown indoors in pots, allowing those living in different climates to enjoy their own home harvest. In this comprehensive guide, we will take you through the entire process of growing guava in pots, from collecting the seeds to caring for your potted guava tree for a bountiful harvest.
Collecting Guava seeds
The journey to home grown guava begins with acquiring guava seeds. Here’s how to harvest seeds from a ripe guava fruit:
Materials needed:
- Ripe guava fruits
- Knife
- Table spoon
Step 1: Choose a ripe Guava
- Select a ripe, ripe guava. It should give slightly to light pressure, which indicates that it is ready for seed extraction.
Step 2: Cut the Guava
- With a clean, sharp knife, cut the guava in half. Be careful not to damage the seeds.
Step 3: Remove the seeds
- Using a spoon, gently scoop out the seeds from the center of the guava. Sometimes seeds can be found stuck in the pulp; make sure you collect them all.
Step 4: Clean the seeds
- Rinse the collected seeds under running water to remove any remaining pulp, then dry them with a clean paper towel.
Germinating guava seeds
With guava seeds in hand, you are ready to prepare them for planting. Correct germination is the prerequisite for having healthy guava plants.
Materials needed:
- Guava seeds
- Wet paper towel
- Plastic bag with zip closure
Step 1: Prepare the paper towel
- Spread the guava seeds on a damp paper towel. It must be moist but not too moist, and make sure the seeds are spaced apart.
Step 2: Fold the paper towel
- Fold the paper towel over the seeds, creating a seed packet.
Step 3: Seal in a ziplock bag
- Place the folded paper towel with the seeds inside a zip-top plastic bag and seal it. This creates a controlled environment for germination.
Step 4: Store in a warm place
- Place the sealed bag in a warm, well-lit area, such as a window sill or near a heat source. Guava seeds germinate best at temperatures between 24°C and 29°C.
Phase 5: Monitoring and waiting
- Check the seeds regularly to maintain the moisture of the paper towel. Germination can take 2 to 8 weeks, so patience is essential.
Planting Guava seedlings in pots
- When the guava seeds have germinated and developed a small root, they are ready to be transplanted into pots.
Materials needed:
- Guava seedlings
- Mixture for potting
- Pots with drainage holes
- Watering can
- Slow-release balanced fertilizer
Step 1: Prepare the pans
- Choose pots at least 10 to 12 inches in diameter and with good drainage holes to avoid waterlogging. Fill them with well-draining potting soil suitable for fruit trees.
Phase 2: Transplanting the seedlings
- Create a small hole in the center of the soil and gently place the germinated guava seedling root-side down into the hole. Carefully cover the seedling with soil.
Step 3: Water
- Water the newly transplanted seedlings abundantly and maintain constant humidity. Guavas appreciate a slightly humid environment, so avoid overwatering.
Phase 4: fertilization
- Once your guava seedlings are established, begin applying a balanced, slow-release fertilizer to provide the essential nutrients they need.
Caring for your potted guava tree
To ensure the success of your potted guava tree, proper care and attention is needed:
- 1. Sunlight: Guava trees grow in full sun, so place the pots in a location that receives at least 6-8 hours of direct sunlight per day.
- 2. Watering: Water the guava tree constantly to maintain uniform humidity. Make sure the soil remains constantly moist, but not stagnant.
- 3. Pruning: Prune the guava tree regularly to maintain its shape, remove dead or diseased branches and encourage new growth.
- 4. Pests and Diseases: Keep an eye out for common guava pests, such as fruit flies and aphids. If necessary, apply appropriate treatments.
- 5. Frost Protection: If you reside in a colder climate, protect your guava from frost during the winter months. Move the pots indoors or use a frost sheet to protect the tree from freezing temperatures.
- 6. Pruning Fruit: Prune excess fruit while it is still small to ensure that remaining fruit grows larger and healthier.
- 7. Harvest: Guavas are typically ready for harvest when they yield slightly to light pressure. Simply twist the fruit gently to detach it from the tree.
Growing guava indoors in pots is a satisfying activity that can yield delicious fruit, regardless of the climate. With the right care, your potted guava tree will flourish and provide you with a bountiful harvest for years to come. Enjoy the sweet tropical flavors of your home grown guava!