How to make homemade lime waterproofing to protect the roof from rain
Roof waterproofing is essential to protect our home from the ravages caused by rain, especially in humid climates. Instead of resorting to commercial products, you can consider making your own homemade waterproofing using lime, an inexpensive and readily available material. Below, I will guide you through the steps to create your own homemade lime waterproofing and effectively protect your roof.
Necessary materials:
- Lime: Lime is a key component in this homemade waterproofing. You can find it at local construction or hardware stores.
- Water: You will need water to mix with the lime and create a consistent paste.
- Natural pigments (optional): If you want to give a touch of color to your waterproofing, you can add natural pigments such as oxides or colored earths.
- Large container: Use a container large enough to mix and store the amount of waterproofing you need.
- Paint brush or roller: To apply the waterproofing to the roof.
Steps to Make the Waterproofing:
Step 1: Container Preparation
Select a clean container large enough to hold the mixture. Make sure it is free of debris and dust that could affect the quality of the waterproofing.
Step 2: Mixing Lime and Water
In the container, add the lime and begin to gradually add water. The recommended ratio is approximately 2 parts lime to 1 part water, but you can adjust depending on your desired consistency.
Step 3: Add Pigments (Optional)
If you decide to add natural pigments to give color to your waterproofing, now is the time to do it. Mix well to evenly distribute the color.
Step 4: Mix until you obtain a homogeneous paste
Continue mixing until you obtain a homogeneous and smooth paste. Make sure there are no lumps and that the mixture has a consistency that is easy to apply.
Step 5: Roof Application
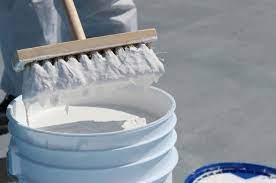
Use a paint brush or roller to apply the mixture directly to the ceiling. Make sure to cover the entire surface evenly.
Step 6: Let Dry
Allow the homemade waterproofing to dry completely. This process may take several days, depending on the weather.
Step 7: Additional Application (Optional)
For added protection, you can apply additional coats of waterproofing once the first coat is completely dry.
Additional Tips:
- Perform this task on a dry day to ensure the waterproofing has enough time to dry properly.
- Make sure the roof is clean and dry before applying waterproofing.
- If you notice any cracks or damaged areas in the roof, repair them before applying waterproofing.
Making your own homemade lime waterproofing is an economical and environmentally friendly option. However, keep in mind that this method is best suited for roofs made of concrete or other similar materials. If your roof is made of different materials, it is advisable to test a small area before applying waterproofing to the entire surface. Protect your home from the rain with this effective homemade solution!